Project Management
Project Management allows you to organize and execute various actuarial and design tasks.
To access this section, click Projects in the sidebar navigation.
Creating a New Project
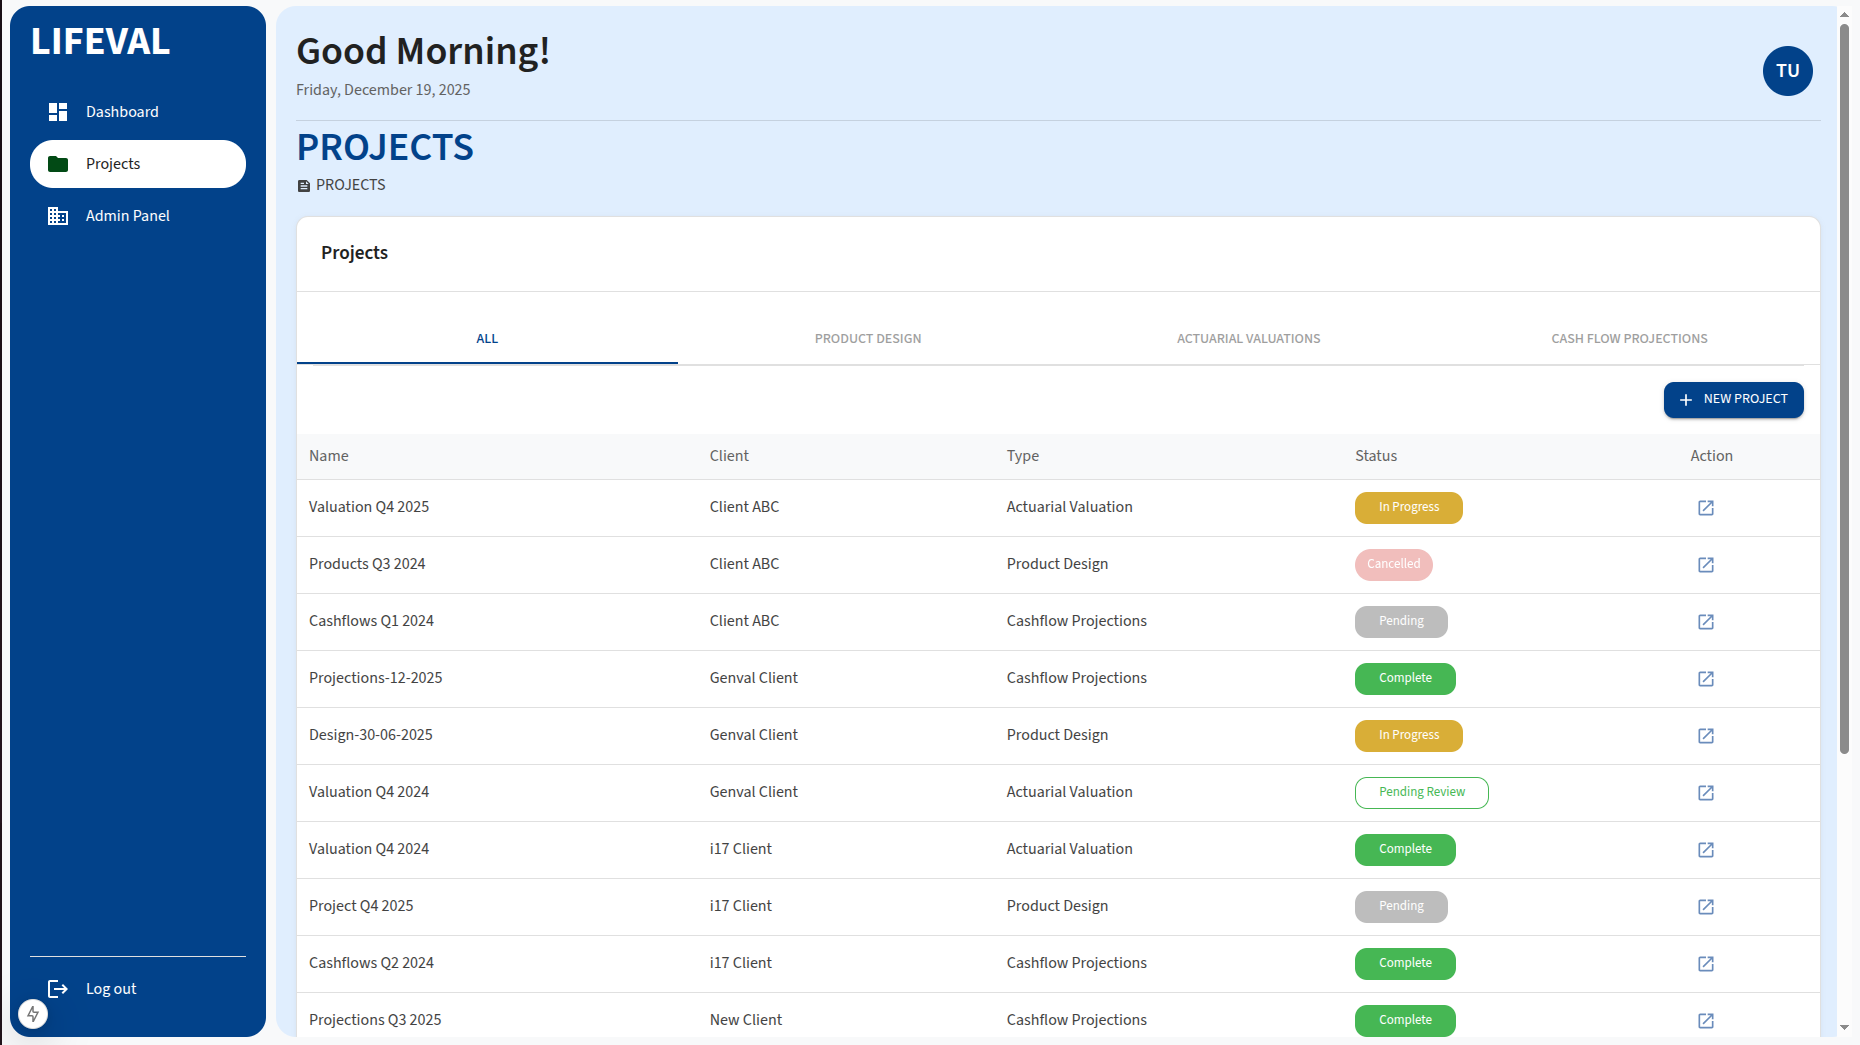
To start a new project, click the New Project button on the Projects page.
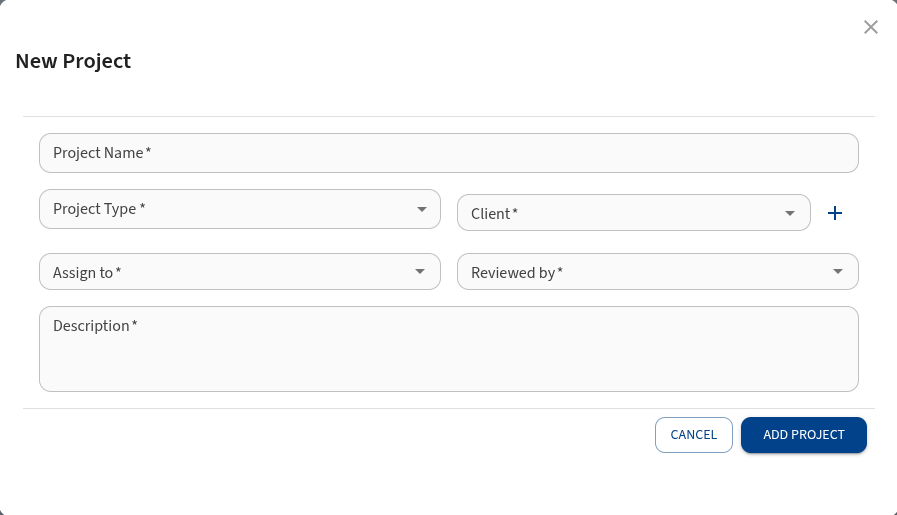
Required Details
- Project Name: A unique name for the project.
- Type: Select the project type from the dropdown:
- Actuarial Valuation: For IFRS 17 and other valuation runs.
- Cashflow Projections: For projecting future cashflows.
- Product Design: For designing and pricing new insurance products.
- Client: The name of the client organization.
- Click on the + sign to add a new client
- Assign to: The project's assignee. They will receive a notification email.
- Reviewed by: The expected person to review the project.
- Description: A brief description of the project's purpose.
Click Add Project to register the new project.
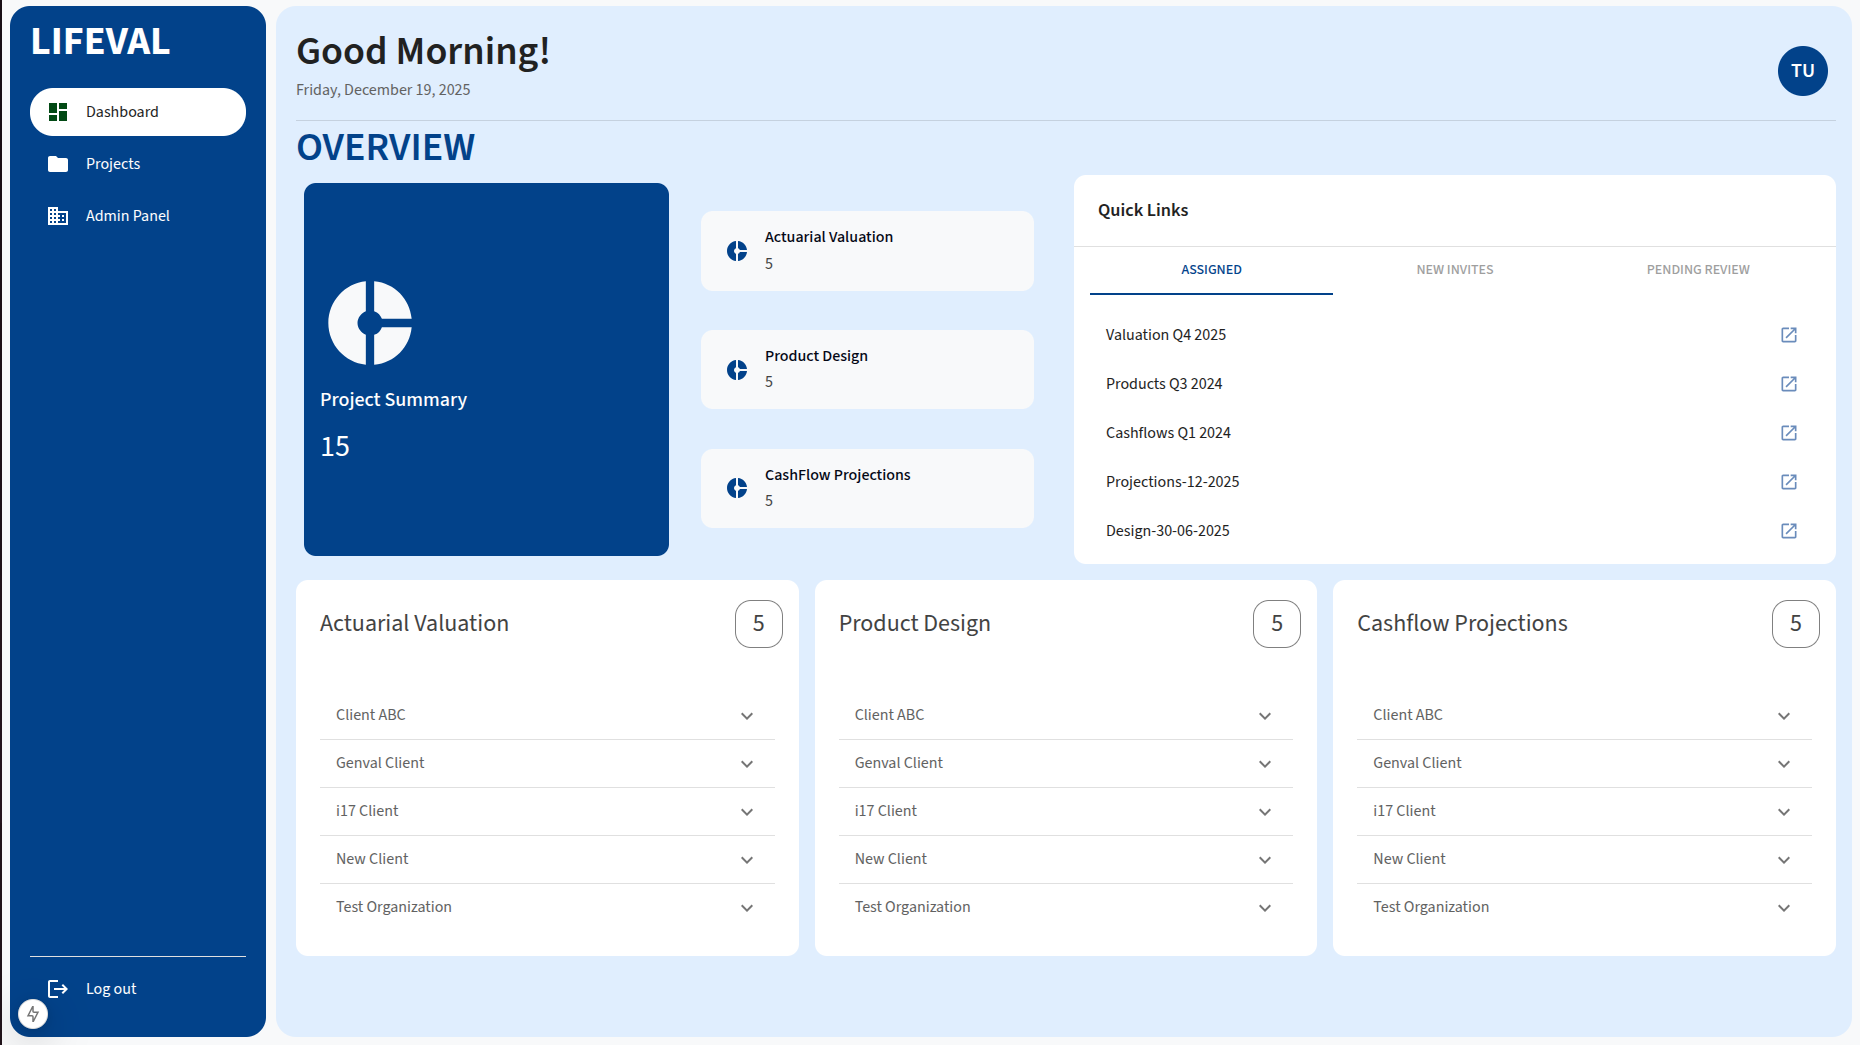
Project Dashboard
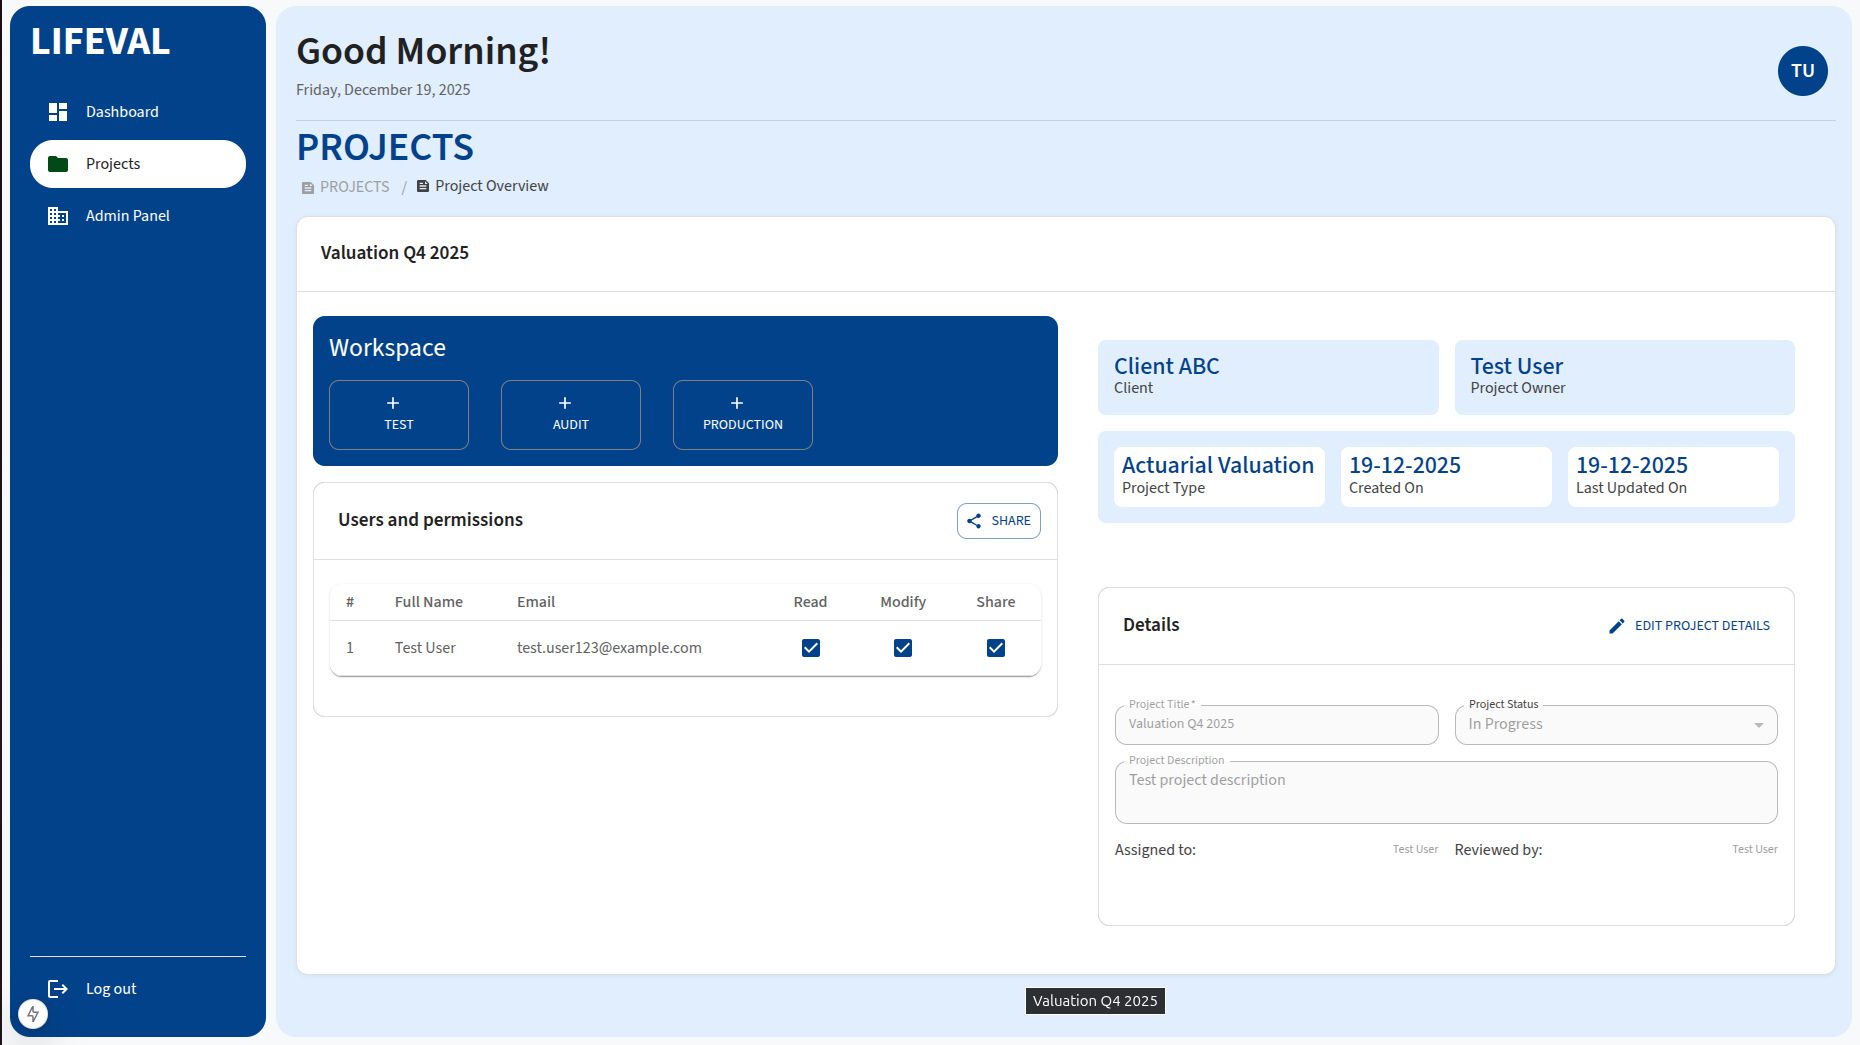
Each project has a dedicated dashboard where you can manage its details, users, and settings. To access the dashboard, click the Launch icon (Action column) for a specific project in the projects list.
Editing Project Details
To update the project's information:
- Locate the Details card on the right side of the dashboard.
- Click Edit Project Details.
- You can modify the following fields:
- Project Title: Rename the project.
- Project Status: Update the status (e.g., from Active to Completed).
- Description: Edit the project description.
- Assigned to: Reassign the project to another user.
- Reviewed by: Change the designated reviewer.
- Click Save to apply your changes, or Cancel to discard them.
Sharing a Project and Inviting Users
You can collaborate with team members by sharing the project and assigning specific permissions.
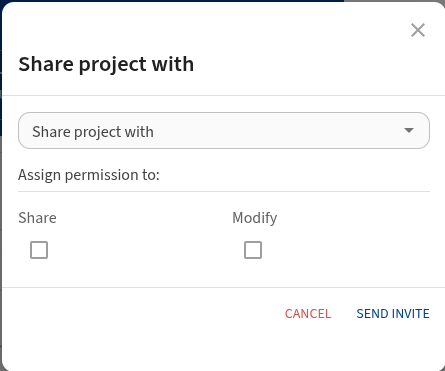
- Locate the Users and permissions card on the dashboard.
- Click the Share button.
- In the dialog that appears:
- Share project with: Search for and select the user you want to invite.
- Assign permission:
- Share: Check this box to allow the user to share the project with others.
- Modify: Check this box to allow the user to edit project details and settings.
- Click Send Invite to share the project.
The user will be added to the Users and permissions table, where you can view their assigned permissions.
Workspace
The Workspace card allows you to manage the specific modules associated with the project type (e.g., Actuarial Valuation, Cashflow Projections). You can initiate or view different scenarios (Test, Audit, Production) directly from this card.